Sunday, March 31, 2013

Brushstrokes, Brushes, Paint Tubes, Details, and Canvas Stretching

A Miscellany

Still thinking about those pesky brushstrokes as I painted today. I was constantly on the alert lest some brushstroke style arrive out of thin air. 

I photographed some details for you today, but first I have some other things to mention. I'll intersperse the details. I hope you can find some value in them.

First, an artist friend and I were discussing the weight of all the paint in our plein air kits. To solve this problem we ordered 15ml empty collapsible tubes from Cheap Joe's.  
Our regular tubes are either 37 or 40ml.

I, for one, never use very much paint when I'm outdoors (actually, I don't use much paint indoors, either). Anyway, even with a lot of brushing, 15ml of paint will last me for four or five days of plein air painting. So why lug all that extra paint around? The idea sounds great for air travel, too. Except I think the method has to be reversed. By this I mean you should take the original tubes, and half-empty them into the 15 ml tubes, leaving the 15ml tubes at home. I think TSA wouldn't like a bunch of white tubes with no official indication of their contents. Better to be prudent....

Susan Sanford commented about my brush-scrubbing on last night's post. Here's a photo covering a portion of the life span of some No. 8, Raphael series 358, round bristle brushes in my studio. I'm pretty sure I have some that are now just nubs, ready to draw with. But I couldn't quickly lay my hands on them. Thus the final stage of their lives is not represented in the photo.


I received a query from a very good painter who has ahead of her the task of stretching some very large canvases. Usually, up to a certain size, she works on canvas laid to panel. But these large ones will require being stretched on conventional bars. She admits that she's not very effective at stretching canvases, and asked for my advice. After ascertaining that she had good stretching pliers, I set about trying describe, pithily, what I do. (I now have great empathy for those in far off countries trying to write instructions in English for ones such as me to follow.) 


Here's what I wrote, interrupted by some painting details:

Not sure how strong your hands are, but one obviously has to get a death grip on the pliers to pull it tight.


Also, make sure you use the fulcrum on the pliers to get that last bit of leverage. There's almost a 'click' as the fulcrum snaps the canvas tight.
When I have time, I always lay the newly cut piece of linen flat on the floor, upside down, before I stretch it. I think that some time spent flat helps the canvas 'relax' from its rolled up state.


Also, I always stretch with the stretcher frame standing on the floor, never laying it flat. I can't get enough leverage when it's on a table, etc.
Yes, it's also true that sometimes a step-ladder is needed. Get yourself high enough on the ladder that the canvas edge is at your waist level. You'll need to do this to get enough leverage with your pliers. Obviously, if it's a step ladder, rather than a step stool, you'll want to have someone around when you do it.
Before I start, while the linen is still relaxing on the floor, I lay the assembled stretcher bars on the canvas, and I lightly scribe the canvas, along the stretcher's perimeter-----and I mean LIGHTLY!---with a dull-pointed awl. Be careful not to scribe hard enough to break the fibers. This will make it easier to get the canvas to turn the 90 degrees onto the plane of the bars' edges.
I do two staples in the middle of each of the four sides. Then I do one each at the very ends of each short side. Then three on each side of the middle two on the long sides, adding, too, one each to the very ends of each long side. Then three on each side of the middle ones on both short sides.


This is followed by six on each long side (three right of center, three left). Then the other long side.


I follow on by the same regimen on each short side----then back to the long sides, and repeat. 

When I've filled up the short sides, I take out and replace the original staples at the ends. 

Obviously, when I've filled up the long sides, I remove the staples at the ends so I can make the corner fold.

I generally leave a good bit of selvage, tacking it flat on the back of the stretchers as a favor to myself, or for someone else who may have to re-stretch the canvas in future.


I find, BTW, that after tediously removing all the staples, re-stretching a canvas is always much easier than it was on the original attempt.

I'm sure you're just itching to make a comment about the brushwork in these details. Perhaps you've found a common thread among them? I'd like to be among the first to know.
I had thought to play an April Fool's joke on you, but realized I was too tired to think of one. So I give you this link to an April Fool's post from last year (though not posted on 1 April).
Cheers,
Donald


Saturday, March 30, 2013

Hayloft and Brushstrokes

Different Strokes

Well, Bruce and Tom certainly put me in my place. They weren't buying that I'm not premeditating the marks I make on the canvas. We can add to those two Ms. M.McN., the questioner from last night, who opened up this subject in the first place.

Honest!!!! I never think about it.

But now, because of their comments, I thought about it all day at the studio. 

Here's today's lousy photo, the hayloft in what will be its frame---though it's now only visiting so that I can judge the whole package. Anyway, as I was whining, this is a less-than-great photo. I actually like the painting so far.


"Hey!"  you might well say, "the photograph's in black-and-white! What gives?" 
The real answer is that I got fed up trying to make the photograph look like the painting. It has a blotchiness that is a painful reminder of my high school complexion.

An added bonus is that it shows you, via black-and-white, the importance of values, composition and drawing. They give 90% of the information the viewer receives about the painting. Yes, the color's fun. But values, composition and drawing are the workhorses, the real stars of successful paintings.

You'll see that, in order to be able to add some light near the bottom of the painting, I made up an access route with a ladder. The ladder is firmly nailed to the floor joist, and is thus completely vertical (without creating a need for guessed-at perspective).

But back to brushstrokes, where I started. 

I've taken some detail shots from within this painting to illustrate a point.  

In the sense that Seurat, for example, used a pointillist technique all through a painting, and with a nod to Van Gogh's brushwork, I claim, again, that I haven't an intentional program with my brushwork.

Detail, lower right, from the Hayloft


But it is true to say that my brushwork, for all its unintentionality, is decidedly my own.

I vary the marks, at least in my mind, depending on what I'm painting. At the moment, I stand accused of vertical marks when painting vegetation. Do I really do that? Is it annoying?

Detail, mid-left, from the Hayloft


(I see it's time to go back and deal with some brush hairs and some other detritus.)

The next is a view of the barn wall, to the right of the opening. You'll notice that, while the hay has very definite brushstrokes, the wall, being only a supporting actor, manages his color with nary an evident brushstroke. 

I believe that there's a hierarchy within every painting. To have introduced strong brushwork into the barn walls would be to encourage the viewer to look at them. I don't want that. I want them to do their job as unobtrusively as possible. Having no evident brush razzmatazz is a good start in that direction.

Barn wall, detail. Intentionally lightened to show colors.
Below is a detail of part of the landscape. with quite different paint handling.

detail from Hayloft landscape

So, apparently, here's the story: I seem to vary my marks depending on what I'm painting and with a regard to how the object, etc., fits into the hierarchy of the composition.

But who doesn't do this? I certainly am not doing it on a conscious level. I'm just trying to paint each part appropriately, in the context of the painting.

Take it from me: don't deal with all the parts of your painting using your 'signature' brushmark. It will be excruciatingly boring, and all about look what I can do!

For now I'm going to get some sleep, resting up so that I'll be ready to defend my brushstrokes from you tomorrow.

Cheers,
Donald

Friday, March 29, 2013

More Questions + Answers


It seems we've elicited a few more questions. As I did last night, I'll interweave some paintings from the archives. BTW, I'm now on Twitter @donaldjurney for those of you more cool than I.

A Summer Storm in the Nivernais, 2010


First question is from a correspondent without a surname. We'll call her M.
I have some questions!
As I have never seen your (very beautiful) work in person I was wondering if 
1) you could go into detail about your brushstrokes (it seems you work with round brushes, smaller strokes (vs. broad strokes), broken color, mostly up and down? Do you use different strokes for the skies than trees?) 
 
M...This has given me some pause---I don't think I've ever thought so consciously about my marks. Yes, I do use mainly round brushes, generally hog bristle. I like having the ability to scrub with the brush. As they get older, and worn down, one can get some nice gestures painting with them, rather like drawing with a recalcitrant stick.
Ah, but the marks. I think that my marks are all over the place, every which way. There certainly isn't a 'vertical' or 'horizontal' pattern to them. I also tend draw 'around' forms,
meaning, in my case, that I tend to describe a form with my brush. Hmmm...size of marks. That entirely depends on what I'm painting, though they are never very large. Somehow I don't think they're much of a feature in my work, certainly not in a stylized way. The painting immediately below has very few marks over much of its surface (30x46", 76x116 cm), but it's largely about the foggy morning. It's the view across a valley toward a house my wife and I once owned in France. It's the nature of the atmosphere in this painting that brushstokes would be (to my eye) tremendously intrusive.

Between Chaumont and Tollecy, Fog  2004
The painting below, painted en plein, but very smoky, air, is a small (probably ca 10x12) on-the-spot study of a conflagration just around the corner from my old studio in Great Barrington, Massachusetts. In this painting, the obvious and vigorous brushstrokes seem to underscore the urgency of the firemen's task. They'd be entirely inappropriate to the foggy scene above.
 
Taconic Lumberyard Fire, 1987


And here's a third specimen. This one is pretty smooth, except in the vegetation on the bank. It shows two kinds of paint handling, used to increase the illusion of distance within the painting.
 
Maudslay Brook, 2011 (16x20", 40x50cm)
  
 2) if you have analyzed any favorite landscape master's strokes and 
 
In the sense that I think you mean it, no I haven't. I've written on the blog about finding methods and manners that suit one's particular temperament. You will evolve your own system of mark making. If you like exercises, try the strokes that have worked for others, just to familiarize yourself with some of the choices. In the end, the manner that is correct will be the one that springs effortlessly from your conception of the painting. All great paintings choose the manner in which they are to be painted. Just accept your role as the brush operator.
 
3) then discuss how you think an artist still searching their way can find their own brushstroke style.
 
I think I just did, under 2)
 
I would really appreciate it! thanks!
You're very welcome. Hope it helps.
----------------------------------------------------------------

A question from D. d'E.,  a follower in Massachusetts:
I have a basic question to ask in regards to painting supports. I know you said you use Claessens #13 SP, mounted to a panel. How exactly do you mount the Linen to the panel? Is it glued? Forgive my ignorance on this subject, I have mostly painted on pre-stretched canvas and would like to explore using other painting supports.
First, I ought to make clear that I MUCH PREFER painting on stretched canvas. I love, and am used to, the bounce from the linen as the brush engages the surface.
 
That said, when traveling a long distance by plane, I bite the bullet and use my linen canvas laid to board. They require a fraction of the room in my luggage and are much less susceptible to damage.
 
I always wind up with extras so sometimes, when I'm too lazy to stretch a canvas, I'll use one of the panels.
 
Gin Lane, Southampton, NY, 1981, 12x16" (30x41 cm), oil on gessoed panel
I use Miracle Muck (available here) as the adhesive. Essentially (as I was taught by a fellow artist) you put some of the Miracle Muck into a paint roller tray, then apply it to the support with a paint roller (in my case the support is Gatorboard, about which here). Lay the canvas on top. Smooth out the bubbles and insure a good bond with a household rolling pin. When you've finished, stack up the panels and weight them with a pile of heavy books (or those sacks of gold from selling your paintings). 


Also, in your opinion what are advantages/differences in painting on a hard surface versus pre-stretched canvas.
And also advantages/differences of painting on Canvas versus Linen.


Hamptons, 1981, 12x16" (30x41cm), oil on gessoed panel


As I wrote above, I like the 'spring' of a taut canvas. I find it much more fun than I do a panel. But panels are sturdier, less prone to damage, and lighter. The hard, unyielding surface of a panel does require some getting used to after canvas. In a way, I feel like my depth perception (in this case it translates to 'touch') gets really confused when I move back and forth between them.

Canvas, in my lexicon, always means cotton canvas, as opposed to linen. Cotton canvas is generally not at all to my liking. Usually it is too coarse for me (I use a very smooth portrait linen, #13 SP Claessens), and the gessoed cotton surface is brutal on brushes. In damp weather it is much more reactive to the humidity in the air, and can become slack. Its saving grace, of course, is cost. 
If you can find a way to get a hold of some linen, do so. Try always to use the best materials in your work. They make all tasks easier.

La Fonte de la Neige, 2001, 36x54" (91x137cm) , oil on linen
  
If you have a question, put it in a comment, below, or write to me at dbjurney@verizon.net

Cheers,
Donald


Thursday, March 28, 2013

Q+A and some other things

A Potpourri

I've been missing in action. I apologize. Sometimes life intrudes.
Tonight I'm going to include some paintings from the archive, trying to keep you awake.


Housatonic, 1988
 

Visiting Hours

This week I've had two visits from artists and a visit from my Boston dealer (Chris Quidley). Chris got to see three new paintings in process, all headed to Boston and then on to Nantucket. All three have been on the blog. The cows (40x48",101x121 cm), Recovery Room (36x60", 91x152 cm) and the Hayloft (36x28", 91x71 cm). They are each close to completion. I'll try to photograph them for you before they leave the studio.


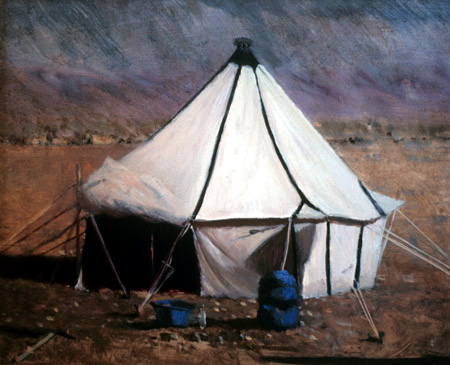
Our Tent in the Atlas Mountains, 1990


A Large Painting to do for New York
 
Additionally, I've ordered stretcher bars for another large painting. It seems, through a miscommunication, that I will have a unexpected frame on my hands (78 x 48", 198x121 cm). My New York gallery (Arcadia) wants me to make a vertical in this large size. You can imagine how daunting that is! In any event, the bars are coming from Upper Canada Stretchers. I have never used them, so we'll see what comes. Several students swear by them. I'll let you know what I think.


A Farm in France, 2008


A Glimpse of the Hudson, 1982


Here are a couple of answers.

First, from K. W., an undergraduate at SCAD, who was a scholarship student at the recent workshop we held in Savannah.
I was just wondering what would be your top 3-5 tips for en plein air and/or landscape painting in general? I am taking a landscape painting class starting this quarter, and I wanted to refresh my mind on what you talked about.

Hmmmm.... 

1. Take the time, where practical, to walk all the way around your subject. Understanding what the back of your subject looks like will help you paint the visible side better.
 
2. Remember that every extra minute you spend in working out your composition, values, and general drawing---while seeming sometimes tedious at the moment----will yield great rewards when you start in with color. There's nothing worse than painting the best tree you've ever done only to find out it would be better placed if it were two inches to the left. Do yourself a favor and get it right in the beginning.


3. Paint with transparent colors as long as you can in the beginning of the painting, bulking up the forms, establishing values, etc. You can always add opacity to these where needed, but you can't get that shimmering translucency back once you've lost it.

4. Keep walking back from your painting, constantly. Don't paint sitting down if your constitution permits. Getting a few feet away can often show you what's working and what's not.

5. After an hour or so, take a hike for ten minutes. You'll come back to your painting with eyes that are refreshed, and you'll often be able to instantly see the solution to a problem that seemed overwhelmingly thorny ten minutes before.


A Promise of Fair Weather, 2008
From IdF, a correspondent from Belgium:


I wonder how you re-paint, re-prepare a canvas in order to paint a new scene on the same canvas with grisaille? can you re-cover the already painted canvas with white oil color, and then re-engage yourself with turpentine for the grisailles? What about the fat on lean process?

Well, I'm no physical chemist, so I can't enter in to too much of a discussion about fat-over-lean. The best explanation I know, describing fat-over-lean, is the example of an inner tube. Paint a section of an inner tube with some white house paint. When it's dry, inflate the tube. You'll see what the issue is.
In my case, I paint so thinly that there aren't continuous, solid paint areas in my work. I don't expect any problems from fat-over-lean. But, if you paint with any sort of real thickness, it's an issue you want to be aware of.
Generally speaking, if I'm painting over a previously painted surface, I just do the grisaille without preparing the canvas. I can usually get enough of a drawing on the canvas to see where I am.
If your canvas is so dark that you need to lighten it to see anything, you ought to take another, different one. 
If, however, you're stubborn(!), you might try scumbling a veil of white over the canvas, allowing it to dry completely before you continue. But, as I said, I'm no physical chemist---so you didn't just read that.
Most of us rarely make a painting that will be in the Metropolitan Museum for centuries after our deaths. So, if it's just a painting for you alone, a chance to learn and to experiment, just go ahead. If, on the other hand, the painting is destined for the Tate, why not splurge on a new canvas?


A Moroccan Market, 1990

A correspondent in France asks how I developed my particular way of establishing an underpainting in grisaille before I carry on to the color.
The painting above, about 12x20" (30x50 cm), is an example of how much you can get in a short time with just a grisaille. It has no color except a variable mixture of burnt umber and ultramarine.
 

My method came about because I didn't have much instruction. I knew what I wanted to do, but I found that keeping a lot of balls in the air at the same time (composition, values, drawing, color) was beyond me. So I sought to break down the process into manageable bits. By working in what is essentially monochrome, I could solve problems without being bewildered by the 10,543 color decisions that lay ahead. When I was confident about the drawing, the arrangement, and the value scheme, I could go ahead, as Winston Churchill described it, and take a joy-ride in a paintbox. 
Now I can get into the color more quickly if I wish, but I almost always do a grisaille first.
One day on the Scotland Workshop last fall we had a deluge near the beginning of the painting day. Because I'd concentrated on a grisaille, and finished it, I was able to have a serviceable souvenir when others only had a few color notes.
One thing to remember: if you do a good grisaille of some spot, and take it home to dry, you can go back to the spot any time you like to make a painting. You'll be all set and, because you've already done an underpainting, you can more easily capture evanescent light effects.

Send me questions please, to my email at dbjurney@verizon.net or ask a question in the comments, below.

Happy Painting!
Donald 


Saturday, March 23, 2013

Odds & Ends

Picking up some threads....

A friend asked me yesterday why I posted half-finished paintings (including some that will never be finished), and why I would post photographs of paintings with which I was having difficulty. I knew he meant the portrait of the young man, and the disfigured cow, in particular.

I replied that I think it's important that readers know it doesn't always go well, or even at all. What one sees on most blogs are finished paintings, all glossy in their party clothes. One could easily get the impression that it's always easy, always a joy. I think it's tough when one is struggling with one's work to see seamless masterpiece after seamless masterpiece. One begins to wonder if this craft can ever be learned, and "what's wrong with me?!!"

The truth is that I don't know a painter, no matter how accomplished and successful, that doesn't turn out duds. The trouble is they never show them to us. But take heart! It's true, there are lots of misfires by painters you admire. 

In my particular case, I show these things to demonstrate that the road isn't always straight and the solution sometimes doesn't come, or comes haltingly. The funeral service we held for the young man is proof of that. So I'll continue to bring you stumbles, in the hope that you will benefit from a little bit of schadenfreude, and that you will realize that paintings that don't work aren't only happening to you.
______________________________________

In the Q&A post, a few days ago, I wrote of red in shadows, caused by light bouncing up from the lit parts and penetrating deep into what would otherwise be gloom. I said that I often use brownish madder to invade that gloom. Coming across a particularly dramatic version of that yesterday, I've decided to send it along. This is one quarter of a larger canvas that I divided into four parts in order to make some small demos. It was begun during a class last summer. 

This is as far as this one got at the time. I've not touched it since and probably won't. But I think it's a good, though extreme, example of the bouncing light effect. As you'll see, this is in a very early stage. I've done a cursory grisaille in burnt umber and ultramarine. Over this I've scrubbed a bit of prussian green in the rear tree masses, and I've quickly brushed in some brownish madder in the under planes of the bush. 

 
Now, almost at the end of March, our ground is still half-covered with snow. But when I look at this slight sketch, the warmth of summer and of that particular day floods over me. Of course I would introduce other colors into the foliage of the bush, and tame the edges of the cast shadows, but I think you'll feel the heat of a hot summer's day.
-----------------------------------------------------------------------
It's been a while since I posted the painting with the two cows. I've not yet introduced the third cow, but the painting is coming along. Like most of my photos of large-ish paintings (42x48", 106x122 cm), the top is a bit too light, and the bottom, especially on the left, is a bit too dark. Perhaps we should nickname this the Goldilocks Effect?
In any event, much remains to be done. I need to further develop the farther bank, and entirely paint the near one. The edges of the trees' foliage must be dealt with. You'll see that I added a tree on the right, and one in the distance. The water must be painted to reflect (ha!) the changes I have made and will make. Some skittering lines of very light ripples and eddies must be included. So there's lots to be done.

For the moment the working title---while there are still only two cows---is Jezebel and her Sister.

This photo is much more monchromatic and more contrasty than the actual painting, as well as being both a bit blurry and a bit blotchy. The field in the distance, lit by the bright overcast sky, is a pale greenish-yellow. Ah, well...I give up.
 
For B.T., J.M., and S. W. : I do know her head is STILL too narrow. I'm working on it.

 
Cheers,
Donald